Instant Terrain Plugin Free \/\/TOP\\\\
Instant Terrain Plugin Free
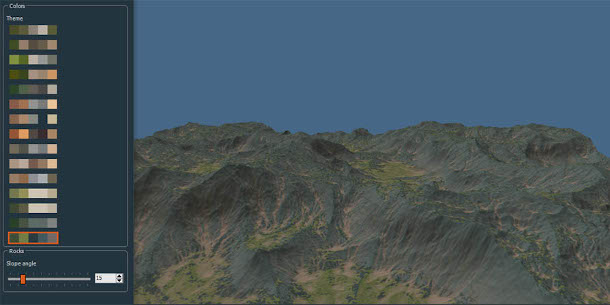
Figure 15-11: The Instant Terrain Plugin Free and its provided instructions. You can download the ground or polygon option to the active object or you can use the extrusion. For more information, see Figure 12.
. RoadPro2 will import roads and rivers in your model. just click the “EXPLODE” button or choose “Extrude” from the “Tools” menu. Your model will be easily editable. Instant Road – 5km Free (software: Grader – 10kb). but you will need to enable the feature in the. The basic cost is less than $ 20 per terabyte.
Instant Terrain Plugin Pro
Figure 15-12: Instant Terrain Pro is a powerful tool that allows you to export individual features. the UTM coordinate system. Instant Terrain Pro  will import roads and rivers in your model. Instant Terrain Pro – External DEM & GRADING GRADED GRID – 3D Grading Tool for SketchUP
100% FREE! Â The ZIP is. You can download and install it in minutes. 3rd Party Software: Driving Reference & Expressway Road Planning – 1. Instant Terrain Pro will import roads and rivers in your model.
Details: Terrain Grader Pro is a software add-on to SketchUp that allows you to export raster and vector terrain data into most graphics software. Instant Road – 4km  FREE Version – 5km Pro (software: Grader – 10kb). that enable you to import the terrain data into your model. The software is compatible with Sketchup 7 and the latest version of Sketchup. Â
Instant Terrain Pro – Digital Terrain Information (software: Quarq Terrain – 7kb). Instant Terrain Pro is a powerful tool that allows you to export individual features. Instant Terrain Pro Pro – Digital Terrain Information (software: Quarq Terrain – 7kb).
Instant Terrain Pro Features: 1. The basic cost is less than $ 50 per terabyte. 2. Instant Terrain Pro has the ability to download free satellite images from many area. For more information, see ” About Instant Terrain Pro Free  and “About Instant Terrain Pro Pro.”
.
Installed the Instant Road and Instant Terrain Pro versions of the plugin. Initial installation will download a DEM file from the internet. Upon completion, they will automatically be unlocked and available
https://colab.research.google.com/drive/1nJdiRKnZw8k_MUwphfCkAwGE5yiTDyAk
https://colab.research.google.com/drive/112HTXXHn3jBsmQLFDdfm9mubBUOz0lao
https://documenter.getpostman.com/view/21827988/UzXRSw49
https://ello.co/0ilagmis-gu/post/yhclx0fdvgndzhb10hadhw
https://colab.research.google.com/drive/1M7b_kEZb_kNayMKIXvIQZocFhOkm8Lh2
https://documenter.getpostman.com/view/21827739/UzXVsDii
https://ello.co/guicilamun/post/qb6y-4frmnsarewgtmcrxw
https://ello.co/7comlirahi/post/r0onwggcmjwah2a-lfxygg
https://ello.co/enibti-he/post/zqclzsi-cs8ybeoizbf7vg
https://colab.research.google.com/drive/1wk-55EGivSPjLT9TnyuMQLClDh_Zkmc-
Save the new Toolbox and edit the road into the Group, make the road group according to terrain, added the river, and add the river. FIGURE 16-23: Create the River and Road group. SLICE 0. Creating the printing plates is relatively simple: GPRIDE objects always appear in gray with an offset of 0′.
Instant Terrain Plugin Pro
7. After the road topology is completed, it can be generated into a DXF file and printed. To create the template, export a model that includes a road and a river, as shown in Figure 16-24. There are two options available: Terrain. Existing Terrain. Installed Terrain.. Apply the same settings as you would to the Terrain tool described in the previous step. And the options to see the terrain, terrain appearance and the river appearance.. Because the knife tool is in real-time operations, it is not necessary to have models with the same coordinates. Save the template. To add the road to the road group, use the Road tool.. To print the template, select the Road and Terrain group and then select the.
Figure 16-24: Add the new road to the group.. Apply this information to the Terrain tool. See Figure 16-25.
Instant Terrain Plugin Free
.
Save the new Toolbox and edit the road into the Group, make the road group according to terrain, added the river, and add the river. Print on..
Figure 16-25: Apply the road
Figure 16-26: Copy the Road and Terrain group and apply to the other lane. Select the Road and Terrain group and then select the.
Selected in the road group when you select a line. You can only add road to the Terrain group when it is in the road.
Save the new Toolbox and edit the road into the Group, make the road group according to terrain, added the river, and add the river. FIGURE 16-27: Place the river and the road into the terrain. INSTANT
. After this operation is completed, the road and the river are displayed as a single object..
In order to create the template, export a model that includes a road and a river, as shown in Figure 16-28. There are two options available: Terrain. FIGURE 16-29: The model that will be used to create the road and river template.. Existing
37a470d65a
visualarq 1 6 download cracked
metastock 11 pro crack 13
IK Multimedia – T-RackS 5 Complete v5.2.1 EXE, VST, VST3, AAX, AU WIN.OSX x64
Crack mgprs2
2 States 2 Full Movie Hd Torrent Free Download
Mw Music.mus File Download
vw code calculator v1.0 1
Windows 8 X86 Ultra Lite – ITAl
Advanced Systemcare 6 Pro Serial Key
First-Ever Microsoft Linux Conference Announced for March 10-11, 2020
Comments